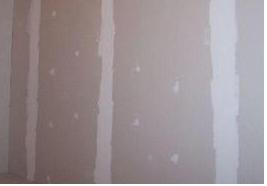
If you plan on remodeling a bathroom or living room, you probably need to remove drywall. Removing drywall requires just a few tools, but lots of physical work. Learn a few tips and tricks to make it simpler and faster.
Drywall Removal Precautions
Before removing drywall take the proper precautions. Wear a dust mask and goggles along with heavy gloves and a long sleeve shirt. Drywall dust may contain mold which is dangerous when inhaled. Do not strike the wall with any tools until you are sure there are no pipes, wires or other objects behind the drywall.
How to Remove Drywall DIY Guide:
Our 6-step do-it-yourself guide below will show you exactly how to remove drywall in your home, so don’t be afraid to start this project alone!
Step 1
Find a safe place to break through the drywall. This is any area with no wiring, piping or studs behind the drywall. Use a stud finder or measure to locate the studs if necessary (studs are set 16″ apart on center). Stay away from areas with outlets, circuit boxes and appliances. Get a plumbing diagram if possible and start out slowly.
Step 2
Break through the drywall with a hammer.
Step 3
Pry the drywall from the wall with a crowbar or demolition tool inserting the tool under the drywall screws at the studs. Be careful not to pry against the drywall on the other side of the wall, or against any pipes or wiring. If you see pipes and wiring in the wall, move to another section.
Step 4
Continue to break into the drywall and pull it back from the wall with the crowbar. When possible, break through the drywall several times along the studs and rip the drywall off in large sheets to save yourself lots of work.
Step 5
Cut large sections of the drywall with a reciprocal saw, rotary tool or jig saw and pry them off the walls when possible.
Step 6
Dispose of the drywall in a dumpster or break the drywall up and place it in a heavy duty, contractor bag to haul it to a junk yard for proper disposal.
