Leveling compound is a mixture of cement designed to pour easily over a concrete floor to smooth out any uneven areas in that floor. The leveling compound is also called self-leveling cement or compound. All it is, is very wet mix cement with a consistency much like tomato soup. It is important to level a floor if you plan to install tile on it so the tiles lay flat and even together.
The first thing to note about leveling compound is that it is not like typical cement. It will dry very hard, but it is not made to trowel onto the surface. It is made to pour. So, when mixing leveling compound the goal is to create a very wet, watery mixture.
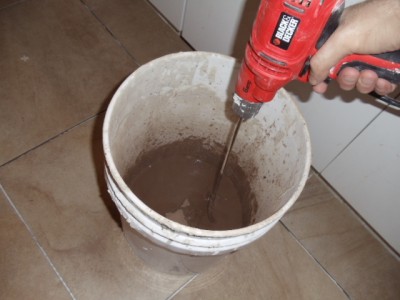
You always start by adding water to the material and mixing with a power drill and mixer bit. The same kind you use to mix paint work best due to the compound’s consistency.
To mix and use leveling compound follow these easy instructions:
1. Clean the floor area
Clean the floor area to be leveled. Check for high spots and gain a good understanding of where you need to apply the compound. It must cover all low spots, and feather up to the high spots.
2. Pour leveling compound in a bucket
Pour some dry leveling compound mix into a big five gallon bucket.

3. Add water
Add water to the mixture from a bucket. Mix until you see the material is evenly mixed and no lumps appear. Check the compound’s thickness. It should be very wet and loose, like soup. It must be very pourable to work properly. However, it should be thicker than water. Try to get it to a thickening level between chowder and water.
4. Pour the leveling compound
Tilt the bucket and pour the leveling compound over the floor starting in the low spots. Or, pour it around a single high spot, if you have just one area that bubbles up or is higher than the rest.
5. Taper the leveling compound
Taper the leveling compound around the high spots with a flat hand trowel. Simply brush it away from the higher areas until it fans out around it and covers the lower floor spots.
6. Feather the edges
Feather the edges of the compound where it meets the level floor with the trowel. Let the compound dry for several hours before walking on it.
7. Check the floor & add another layer
Re-check your floor with a straight level. If there are still gaps, the first layer did not completely level the floor. You need to add a second layer. Mix up another batch and pour like you did the first batch, before the compound completely dries.
8. Final checks
Check the floor for level again. Once level, let dry for 12 to 24 hours before you tile. Review your leveling compound instructions for accurate dry times.
Do not spend a lot of time troweling the leveling compound. it should level out by the force of gravity for the most part. Feathering the edges will simply help to flatten out the seams and make a smoother transition to the floor.
You will find leveling compound at a hardware or home improvement outlet along with the mortar and tiling accessories.
